Cinematic Green Explained
- Huaigu LIU

- Nov 11, 2019
- 2 min read
In this short tutorial, I will demonstrate the way to achieve a cinematic green look by Lightroom. If you don't have a Lightroom, that is fine. You can surely achieve this look in other application as well.
You can check the look before editing and after editing by the screenshot I did down below. I took this picture in Hokkaido, Japan just before Christmas last year. The city was snowing heavily. It almost

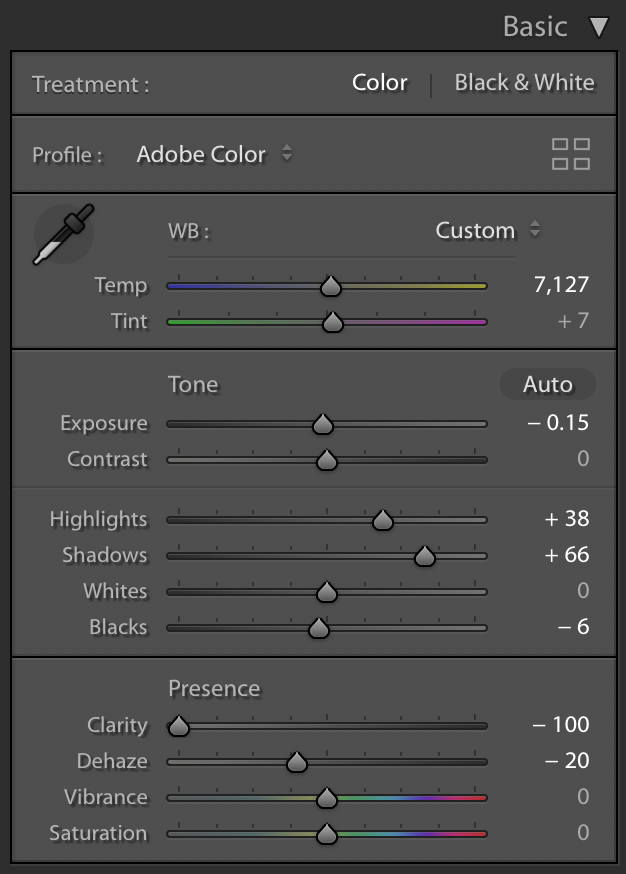
First, we take a look at the basic panel. I lowered the exposure a little bit to make the scene darker. The highlights are increased to make the image a bit more contrasty. The shadows are increased for the audience to see more details. The two most important changes I made are clarity and dehaze. If you don't see dehaze in your basic panel, please update your Lightroom as soon as possible. I pull clarity all the way down to -100. It creates a dreamy effect. We don't see things that is too sharp. I also decrease the dehaze to -20. As we know, adding number to dehaze is to make the image get less haze. Thus, decrease the number means to add more haze to the image. It makes the image foggy and mysterious.
Next comes the split toning. A very typical movie color grading technique is to add warm color to the highlights and cold color to the shadows. In this case, I used an orange color as highlight and a green color as shadow which the exact color you can see around the image.

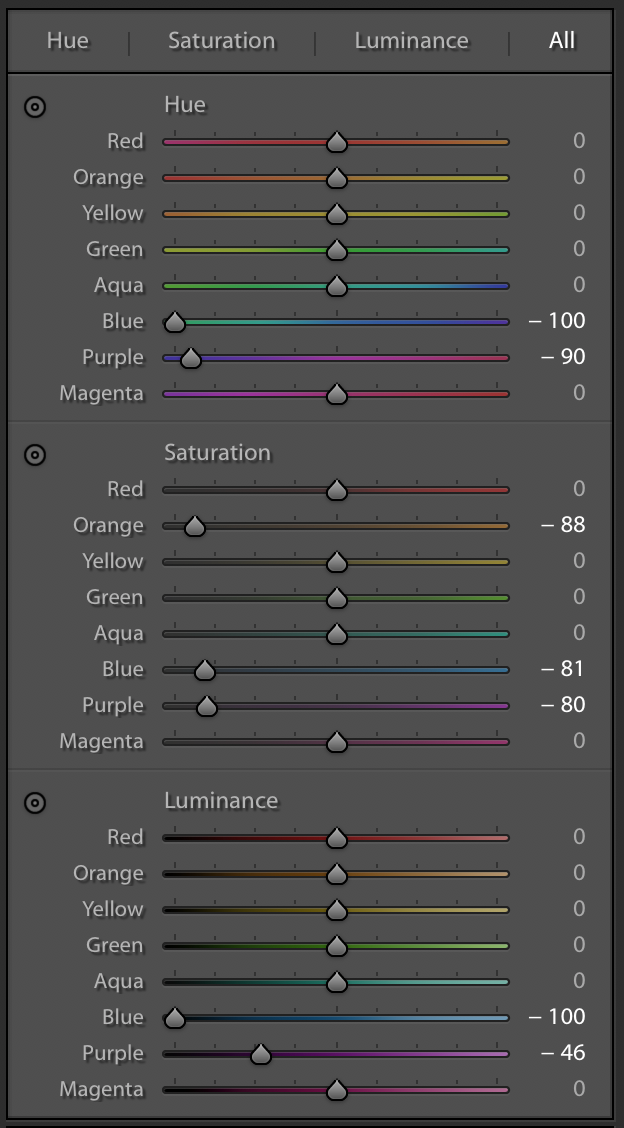
Now it comes to the HSL panel. The essence of this step is to delete unnecessary colors. In this case, the blue and purple is annoying for the picture. So I changed their hues, saturations , and luminance to delete these color.
The last step is to add some vignetting so the audience can better focus on the center of the image.

If you want to make the subject even more standout, an oval selection tool can help you better focus on the subject.

This is the end of this tutorial. If you have any questions, welcome to comment down below. Thanks for reading this article!


Comments